Kimmie Bee’s Chicken and Dumplings

Share

Nothing wraps you up like a cozy blanket and a bowl of complete comfort! This bowl is just that. Simple ingredients? Yes. But, there is nothing lack luster or plain about the flavor!

You will need:

  • 2 whole chicken breast, bone in and skin on or 4 boneless skinless chicken breasts
  • a drizzle of oil of your choice
  • 2 cartons of chicken broth (32 oz each)
  • 4 whole carrots
  • 3 ribs of celery
  • 1 large onion
  • poultry seasoning (sprinkled liberally on the chicken)
  • fresh rosemary and thyme (1 tablespoon if fresh) and 1 teaspoon each if dried
  • salt and pepper to taste
  • 1-2 tablespoons of better than bouillon chicken base 
  • any other seasoning you choose (garlic powder, etc., but keep it simple)
  • 3 cups of flour
  • 1 1/2 sticks of very cold butter
  • 1/3 cup of very cold vegetable shortening (or use all butter instead of adding shortening)
  • 1 teaspoon of salt
  • 8 tablespoons of ice cold water

Season the chicken on both sides. Heat a large dutch oven over medium high heat and drizzle with oil.  Sear the chicken on both sides. Add in the carrots, celery, onion and dried herbs (if using fresh save those until just before adding your dumplings).  Add in one carton of the chicken broth.  Bring to a boil and then reduce to a steady simmer.  While the chicken and veggies are cooking, prep your dumplings.

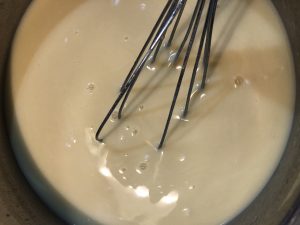
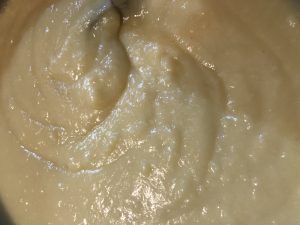
Combine the flour and salt in a bowl or food processor with a dough blade. Then add the butter and shortening (cut in cubes first).  Pulse until the mixture resembles peas.  If doing by hand, use two butter knives like scissors to cut the butter into the flour.  Or, you can use a pastry blender. Once the butter is incorporated, add the 8 tablespoons of water and blend until a ball is formed in the food processor or you’re able to mold the dough into a ball. If you need to, add more water, a little at a time, until the desired consistency is reached.  Roll dough out to the thickness of a nickel and cut in a checkerboard pattern.  

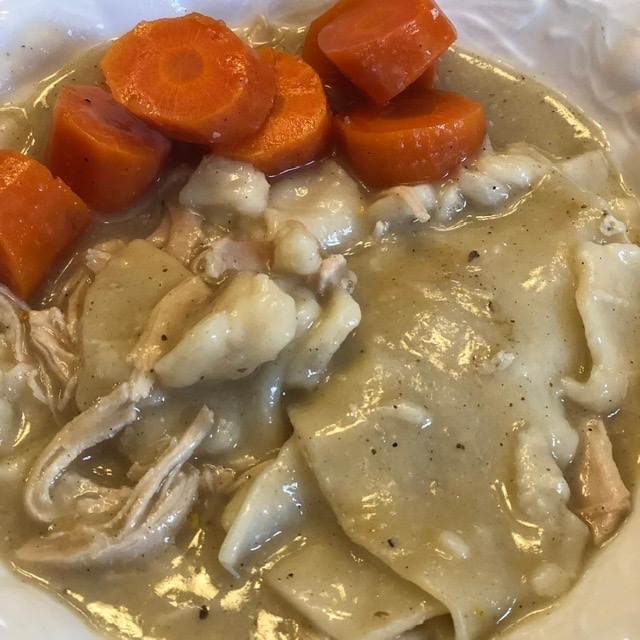
Add the remaining stock, chicken bouillon base and the fresh herbs, if using fresh, and check for seasoning. Adjust to your liking.  Remove the chicken and veggies from the stock and put aside. The veggies have done their job of flavoring the stock, but the carrots are GREAT to eat. Make sure the stock is simmering and carefully drop in your dumplings. Each time you drop in more, stir from the bottom. Once all of the dumplings have been added to the pot, chop and add the chicken back in. Remove the skin and bones, first, if you used bone in/skin on chicken. Cook for 5 minutes longer.

Enjoy!

#yumola

Kimmie Bee’s Vegetable Egg Rolls

Share

These egg rolls are SO FREAKING delicious! I am a self proclaimed food snob and have been SO disappointed with take out egg rolls. Of course there are some good ones out there, but making them at home is super easy with the added benefit of your being able to control the quality of ingredients. And, they are YUMOLA every time! Please try these.

You will need:

12 egg roll wrappers (I use vegan wrappers)

Oil for frying the egg rolls (peanut oil is preferred, but can use vegetable oil)

2 tablespoons of sesame oil

1 tablespoon of ginger, finely chopped

3 cloves of garlic, minced

1 cup of carrot, shredded

3 cups of cabbage shredded (I use packaged slaw mix)

5 scallions, chopped (tops and bottoms)

8 oz package of your favorite mushrooms (can also use ground pork, chicken or shrimp)

1/2 teaspoon of crushed red pepper flakes

2 – 3 tablespoons of coconut aminos (can use soy sauce)

1 teaspoon of sugar

1/2 teaspoon of salt and freshly ground pepper

Heat a sauce pan over medium heat. Add the sesame oil and mushrooms and cook for 3 minutes. Add all of your other vegetables to the pan as well as the salt and pepper. Cook for 5 minutes or until the vegetables are at your desired tenderness. Add the soy sauce and sugar and cook for an additional minute. Taste to see if you need to add more seasoning. Transfer the mixture to a bowl and set aside to cool for 5 to 10 minutes.

To assemble the egg rolls, place a wrapper diagonally on a flat surface. Put about 2 tablespoons of the vegetable mixture in the center of the wrapper. Follow the instructions on the wrapper packaging to fold, but basically you are going to fold each side in first. Then, grab the bottom of the wrapper and fold it over the filling; tightly rolling until you’ve reached the top. Seal by wetting with a little water and place the egg roll on a plate with the seam facing down. Repeat until all of the filling has been used.

To cook, heat a heavy frying pan (I use cast iron) and add enough oil to come a little over half way up the pan. When the oil is hot, carefully place the egg rolls into the pan and cook for 2 minutes per side, or until brown. Be careful not to crowd the pan. Transfer them to a paper towel lined plate to drain. Enjoy!

#yumola

Kimmie Bee’s Orange Chicken

Share

This is one of my husband and son’s favorite dishes. It is so simple to make, but would stand up against any orange chicken out there. Seriously! For you vegetarians and vegans, you can use mushrooms instead of chicken and omit the buttermilk. I hope you will give this recipe a try. You will NOT be disappointed.

You will need:

4 boneless skinless chicken breasts (can use thighs as well) cut into bite size pieces

buttermilk to cover the chicken

1/2 cup of flour

1/2 cup of cornstarch

salt and pepper (about 1/2 teaspoon each)

oil for frying (peanut, grape seed or your favorite oil)

1 cup of orange juice (freshly squeezed is my jam)

3/4 cups of sugar

3/4 cups of white vinegar or rice vinegar

3 – 5 tablespoons of coconut aminos (can use soy sauce)

1/2 teaspoon of fresh ginger, chopped finely

3 cloves of garlic, minced

1 teaspoon of crushed red pepper flakes (1/2 teaspoon for less heat)

the zest from one orange

1 tablespoon of cornstarch mixed with 3 tablespoons of water

For the Chicken:

Place your chicken in a bowl and cover with the buttermilk. Set aside while you prep your dredge. In a shallow dish, mix the flour, cornstarch, salt and pepper. Dip the chicken into the flour mixture and coat evenly. Heat a heavy frying pan (my favorite is cast iron) over medium high heat. Add enough oil to come half way up the pan. Once the oil is hot, fry the chicken in batches and place on a paper towel lined plate to drain. Repeat until all of the chicken is done.

For the sauce:

Put all of the ingredients, except for the cornstarch mixture and orange zest, into a sauce pan and heat for 3-5 minutes, stirring occasionally. Add the cornstarch and continue to cook until the mixture is thickened. Remove from the heat and add the orange zest. Toss the chicken into the sauce to coat and serve over rice.

#yumola

Kimmie Bee’s Lobster Bites

Share

These are crispy, light and SCRUMPDILIOCIOUS! The delicate sweetness of the lobster paired with the simple breading is a perfect combination. They don’t take long to cook, so don’t turn away while they are frying. They are a perfect accompaniment to my shrimp and grits!

You will need:

4 lobster tails, shells off and cut into bite sized pieces

1 egg, beaten with 1 tablespoon of water added

1 to 2 tablespoons of my Cajun spice blend (see recipe under ‘Tips’) or your favorite spice blend

1 cup of flour

1 tablespoon of corn starch

Oil for frying (I use grape seed or smart balance oil)

Heat your pan over medium high heat and add the oil once the pan is hot. While the oil is heating, place your lobster in a bowl. Put the flour and corn starch in a separate bowl and whisk to combine. Season your lobster and flour/corn starch mixture with the Cajun spices. Pour the egg mixture over the lobster. Lift out the egg coated lobster and place it into the bowl with the dry ingredients. Toss to coat and fry just until golden brown (about 3-5 minutes). Drain on a paper towel and serve.

#yumola

Kimmie Bee’s Cajun Shrimp & Grits

Share

I don’t know how authentic this recipe is, but I do know it is a huge hit with my family and everyone who has tried it. I hope you enjoy my version of this popular dish.

For the shrimp you will need:

1 pound of bacon (can omit and use your favorite oil of choice)

2 pounds of raw shrimp, peeled and deveined

1 medium onion, chopped

1 red bell pepper, chopped

1 green bell pepper, chopped

3 cloves of garlic, minced

2 tablespoons (or more) of my Cajun spice (see recipe under tips) or your favorite Cajun spice blend

1/2 – 1 stick of butter

1/4 cup of white wine you would drink (not sweet) or chicken stock (can use broth)

1 bunch of green onion, chopped**

For the grits you will need:

1 cup of old fashioned grits

4 cups of chicken broth or stock

2 tablesooons of butter

1/4 cup of heavy cream

1 cup of sharp cheddar cheese (more if you like it extra cheesy)

For the shrimp:

Chop the bacon and place in a large sauté pan. Fry until crisp; remove, drain on a paper towel and set aside. In the same pan, add the onion and peppers to the bacon fat and cook for 3-5 minutes on medium high heat. Sprinkle with 1 tablespoon of the cajun seasoning and stir. Add the garlic, butter, shrimp and the remaining cajun seasoning and cook for 2 minutes. Stir in the wine or chicken broth/stock and simmer for an additional 3 minutes or until the shrimp turn pink. You do not want to overcook the shrimp.

For the grits:

While the bacon is rendering, start your grits and cook according to the packaging making sure to use the chicken broth/stock instead of water. The grits will take 20 minutes to cook. Be sure to stir them, occasionally, during the cooking process to prevent lumps. One minute before the cooking time ends, stir in the 2 tablespoons of butter and the 1/2 cup of heavy cream. Remove from the heat and stir in the cheese.

To assemble, ladle some of the grits into a shallow bowl. Top with the shrimp, chopped green onion and bacon.

Enjoy!

*I use wild caught extra jumbo shrimp – 16/20 per pound or colossal- 13/15 per pound

**the chopped green onion isn’t shown in my picture but, trust me, you want to add it. I just snapped the picture before sprinkling it on top.

#yumola

Granna’s Peach Cobbler

Share

Peach cobbler and ALL OF THE FEELS have gone hand in hand for as long as I can remember in my family. It usually meant my Mom was in the kitchen surrounded by all of her loves who were anxiously awaiting her masterpiece! My Mom’s peach cobbler was (and still is) a huge part of every family gathering. No one can make it quite like her and EVERY ONE of us measures the success of our own version by her example. Mine is the best … just saying. Shhhhh, don’t tell my sisters or other family members. It was no easy task to watch her throw in ‘this and that’ and then adapt that to a recipe. So, although this will not be exactly like Granna’s Peach Cobbler, it’s pretty darn close.

You will need:

8 peaches peeled and sliced (or frozen)

a squeeze of lemon 

2 Tablespoons flour (or 1 T of corn starch)

1 cup sugar (more if the peaches aren’t sweet)

1 1/2 sticks of butter (reserve 1/2 a stick to put on top of the crust)

1 teaspoon vanilla

1/4 teaspoon of cinnamon or nutmeg  (I prefer nutmeg)

1 pie crust recipe (see my recipe under ‘Tips’ or buy two store bought crusts)

Preheat oven to 375 degrees

Place the peaches in a large bowl and add the squeeze of lemon, flour (or cornstarch), sugar, vanilla and cinnamon (or nutmeg). Mix together and pour into a glass or ceramic baking dish. Add 1 stick of butter (cut in cubes) on top of the peaches and place into the oven. Cook until the peaches cook down a bit and the mixture starts to bubble or about 15-20 minutes.

While the peaches are cooking, make your pie crust or roll out one of your two store bought crusts to fit the baking dish. Carefully remove the peaches from the oven and taste for sweetness. You want it to taste a little too sweet. If it doesn’t, add a little more sugar. Just trust me. Place one pie crust on top. Spoon some of the peach mixture over the top of the crust and place it back into the oven for 5 minutes just to let the dough start to cook and puff up a bit. Remove the dish from the oven and place the final crust on top. Randomly place the remaining 1/2 stick of butter on top of the crust and sprinkle with a tablespoon of sugar. Put the cobbler back into the oven and cook for 15 minutes or until the crust browns. Top with vanilla ice cream and feel ALL OF THE FEELS!

Enjoy 💗

#yumola

French Onion Soup

Share

This is, hands down, my husband’s favorite soup! So, I decided to try making it for him. And, oh my goodness, am I glad that I did. My version is simple, but extremely flavorful. It’s even better after a few days. Top it with a slice of toasted cheesy French bread and your taste buds will be dancing!

You will need:

3 large Vidalia or sweet onions, thinly sliced

1/3 cup of butter

1/2 t dried thyme

1 bay leaf

1 t Kosher salt

1 t freshly ground black pepper

1/3 cup of red wine (one you would drink)

1 T Worcestershire sauce

8 cups of beef broth (can use vegetable broth)

1 French baguette sliced

Olive oil

1 clove of garlic

Freshly grated Gruyere and Parmesan cheese

Heat a Dutch oven or stock pot on medium high. Add the butter and onions and turn the heat down to medium. Cook the onions, stirring occasionally, for 45 minutes. You don’t want the heat too high. So, turn it down if you need to. This is a ‘low and slow’ method to bring out all of the sweetness in the onions while slowly browning them. Once your onions are done, add all of the spices and stir. Add the wine and stir to deglaze the pan. Cook for 1 minute. Add the Worcestershire and broth and bring to a boil. Reduce the heat to low and simmer for 1 hour. Remove the bay leaf and check to see if additional salt and pepper are needed.

While the soup is simmering, put the sliced bread on a cookie sheet, drizzle with olive oil and broil for 1 minute on each side. Remove from the oven and rub the garlic clove on each slice of the bread. Mix the two cheeses together and sprinkle equal amounts of cheese on each slice and put back under the broiler to melt the cheese.

To assemble, put some grated cheese in the bottom of your bowl, top with a ladle of soup. Add a slice, or two, of the toasted bread on top of the soup and serve. Enjoy!

#yumola


Kimmie Bee’s Turkey Meatloaf

Share

Meatloaf, to me, paired with mashed potatoes (gravy optional) and a vegetable  is a timeless classic. It’s like a cozy blanket and a warm fire. Pure comfort! My family loves it with ground turkey, but feel free to use ground beef.

You will need:

 1 1/2 pounds of ground turkey thighs

1 slice of bread (or 1/2 cup of plain bread crumbs)

1/2 cup of milk

1 egg beaten

1/2 cup of onion, chopped finely or grated

3 cloves of garlic, minced

1/4 cup of Italian parsley, chopped finely

1 T Worcestershire sauce

3/4 t kosher salt

1/2 t freshly ground black pepper 

1/2 t ground sage

1 t poultry seasoning

2 T of your favorite ketchup plus 1/4 cup

Preheat your oven to 350 degrees. 

Mix all of the ingredients, except for the 1/4 cup of ketchup, in a large bowl. Put the bread into the milk and soak, then break apart with your fingers before adding it with the other ingredients. Once everything is combined, place the mixture into a loaf pan and shape into a loaf. Spread the remaining ketchup on top of the loaf and bake, uncovered, for 55 minutes. Let it cool for 10 minutes, slice and enjoy.

#yumola

Granna’s Salmon Croquettes

Share

This recipe just reminds me of my childhood. From the aroma to the taste to what was served with them, it transports me back in time. Salmon croquettes were a staple in our house; always served with homemade biscuits and white rice. Always! My children absolutely LOVE them and since my Mom lives with us, they are able to have them any time. My Mom never cooked with a recipe, so when I was learning to make them, I literally had to stand next to her as she put each ingredient into the bowl and say, “Wait … let me measure that!” This recipe is as close as I could get to hers. I think it’s pretty spot on.

For this recipe, you will need:

1 can of salmon (I like to use Alaskan wild caught)

1 egg, beaten

1 small onion, grated

1 tablespoon of cornmeal

1 tablespoon of flour

1/4 teaspoon of salt

1 teaspoon of pepper

oil for frying

In a mixing bowl, combine all of the ingredents and form into patties. Heat oil in a large frying pan on medium high heat. Add the patties and cook until brown on each side, turning once. They will take approximately 3 minutes per side. Drain on a paper towel and serve immediately.

My twist is to add a teaspoon of my spice blend instead of the salt and pepper. You can find the recipe for my spice blend under the ‘Tips’ tab entitled, ‘No more store bought spice packets, Part 2’.

Enjoy!

#yumola

Kimmie Bee’s Banana Pudding

Share

My husband LOVES banana pudding and asked me to make it this past holiday weekend. We both grew up eating this simple and delicious treat. So, I was happy to oblige! SO good! I hope you will give it a try.

You will need:

For the pudding:

1/3 cup of all purpose flour

2/3 cup of sugar

1/4 teaspoon of salt

3 whole eggs and 1 egg yolk, beaten

1 cup of whole milk

1 cup of heavy whipping cream

1/2 teaspoon of vanilla extract

2 tablespoons of softened butter


For the whipped cream:

1 cup of heavy whipping cream

2 tablespoons of sugar

Additional Ingredients:

2-3 bananas, sliced

1 package of vanilla wafers

For the pudding, put the flour, sugar and salt into a saucepan. Stir to combine. Add the beaten eggs and milk. Stir well and cook over medium low heat, whisking CONSTANTLY, for approximately 10 to 15 minutes. I know. I  know. That will seem like an eternity, but WHISK you MUST! Once the mixture has thickened (it coats the back of a spoon and does not drip off), turn off the heat and stir in the vanilla and butter until smooth. Place the pudding into a bowl, cover with plastic wrap and refrigerate while you prepare the whipped cream.

For the whipped cream, chill a metal bowl and whisk in the freezer for 10 minutes. Place the sugar into the mixing bowl and add the whipping cream. Whisk (starting on low and increasing the speed to medium high) until the cream has stiff peaks.

To assemble the dish, start with a layer of wafers then add a layer of bananas followed by a layer of pudding and ending with a layer of whipped cream. Repeat until you reach the top of your dish making sure to end with a layer of whipped cream. Finish with crushed vanilla wafers on top. For a dramatic presentation, double the recipe and layer in a trifle dish or another deep serving dish. Chill for at least one hour before serving.


Enjoy!

#yumola

*NOTE* If you must have an extra silky and smooth pudding, you can use 6 egg yolks instead of 3 whole eggs and 1 yolk, but I  promise it is not necessary.