Pie Crust 101

Share

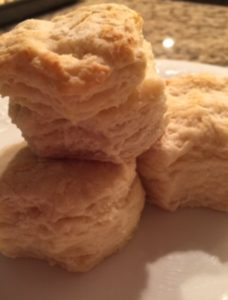
There are a few keys to making THE BEST pie crust every time. ICE COLD butter, ICE COLD vegetable shortening and ICE COLD water. And, handling the dough as little as possible. My Mom never measures a thing and would always tell me, “Kim, you just have to feel the dough. If it’s too sticky, you need more flour and if it’s too dry, you didn’t add enough water.” Uhmmm, Ohhh kayy. But, she was right. Although I’ve figured out measurements, it’s still very much a ‘feel’ involved in making pie crust. Okay. Ready? I have faith in you!

1 1/2 sticks of VERY COLD (like stick it in the freezer cold) unsalted butter

1/3 cup of VERY COLD vegetable shortening (you can use all butter instead of adding shortening, which is what I’ve started doing lately)

3 cups of flour

1 t of kosher salt

1 T of sugar (this was my addition to my Mom’s recipe … you can omit, if you like, for savory dishes)

8 T of ICE COLD water (start with this and add more if you need it)

Dice the butter and place on a saucer and put into the refrigerator while you prepare the other ingredients. Place all of the dry ingredients into a food processor (with a steel blade) and pulse a few times to mix. Add the butter and shortening and pulse until the flour and butter look like pea size crumbles. With the machine running, slowly add the water down the feed tube until the dough begins to form into a ball. Dump it onto a floured surface and roll into ball; wrap with plastic wrap and refrigerate for 30 minutes. Do not skip this step.

After 30 minutes, remove the dough, cut it in half and roll out each half on a well floured surface into a circle. Roll from the center to the edge, turning and flouring to make sure it doesn’t stick to your surface. Roll it to fit your desired pie pan and repeat the process for the top crust.

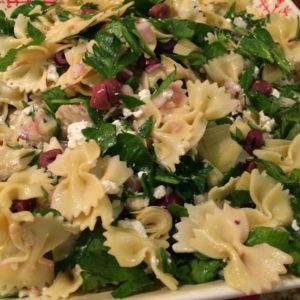
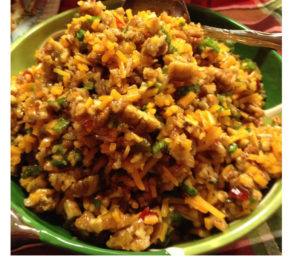
I use this recipe for sweet and savory dishes … peach cobbler, chicken pot pie, empanadas, apple pie, etc. Those recipes will be coming soon  😊

*** Note: If you don’t have a food processor, you can mix in a mixing bowl and use two knives or a pastry knife to cut the butter/shortening into the flour. ***

No more store bought spice packets

Share

So, what is exactly in those convenient little spice packets that everyone buys? You know the ones for tacos, spaghetti … even gravy … the list goes on and on. If you can’t pronounce an ingredient and have to look it up in a dictionary to find out what it is, chances are it’s not good for you. Sure, there are some healthy spice packet options out there, if you choose to buy them, but why not make your own? It’s simple and you control the amount of each spice that goes in. Just remember that spices have an expiration date. So, be sure to throw out that poultry seasoning from Thanksgiving 2003. 😜 I’ll get you started with my favorite taco seasoning blend.

Taco Seasoning
1 1/2 T chili powder
1/2 t garlic powder
1/2 t onion powder
1/2 t oregano
1/2 t red pepper flakes
1 t paprika
2 t ground cumin
1 t kosher salt
1 t freshly ground pepper

Mix all the spices together and use as much or as little as you like. I typically use 2 tablespoons per pound of meat. Store in an air tight container.

Say, “Goodbye” to dry; tasteless chicken!

Share

Never serve dry; tasteless chicken again. Whether you are going to bake, fry, grill or roast your chicken, start off by brining it. What’s brining? Well, brining is simply soaking in salted water. You can add other seasonings, but the KEY components are salt and water. And, why MUST you brine? Try it once and then be sure to come back and tell me how AMAZING your chicken was. You won’t ask, “Why?” again. For those of you that already brine, back me up here. I promise you will be a ROCK star and never serve dry chicken, turkey or any other poultry again. So, what do you need?

1 gallon of warm water (or enough to cover your poultry)
3/4 cup of kosher salt
You can add 2/3 cup of brown sugar, garlic, dried or fresh herbs, coconut aminos (what I use instead of soy sauce) … the options are endless and only limited by your imagination and taste buds.

Pour the water into a container big enough to hold the chicken. Pour the salt and other seasonings into the water and stir to dissolve. Allow the brine to come to room temperature. Place the chicken into the brine, cover and refrigerate overnight for a whole chicken; 2 hours for boneless and 4 hours for bone in pieces. If you’re cooking a turkey, adjust the water and salt accordingly. For example, if your bird is approximately 10 pounds, you will double the water & salt. Drain, rinse, pat dry and you’re ready to season with spices, fresh herbs, etc. and cook.

Pasta with Mushrooms and Pancetta

Share

This dish will have your guests thinking you’ve been cooking all day! It is SOOOO good and packed full of flavor. You can even omit the pancetta and have a perfect vegetarian dish. You will need ….

12 oz of mixed mushrooms (chanterelle, oyster, baby portobello), sliced

2 cloves of garlic, minced

2 sprigs of fresh thyme, leaves removed

kosher salt & freshly ground pepper to taste

1/2 t red pepper flakes

3 T butter

3 T olive oil

the juice of 1/2 of a small lemon

4 slices of pancetta, cut in small pieces

fettuccine or angel hair pasta cooked and drained

1/2 cup of freshly shaved parmesan cheese

Render the pancetta in 2 tablespoons of olive oil over medium heat until crispy. Remove, drain on a paper towel and set aside. In the same pan, add 1 tablespoon of olive oil, mushrooms and garlic. Sauté for 5 minutes.  Add the thyme leaves, salt, pepper red pepper flakes, lemon juice and 1 tablespoon of butter. Put the cooked pasta in a serving dish and toss with the remaining 2 tablespoons of butter and 1/4 cup of the parmesan. Top the pasta with the mushrooms, rendered pancetta and the remaining parmesan.

#yumola

Nut Dip

Share

People LITERALLY go bonkers for this dip. It has the weirdest combination of ingredients and is rather simple to make. Yet, you will want to double or triple the recipe because it is just that popular. Pair it with corn chips … the big scoopers .. and yah, you’ll be hooked, too!

You will need …

8 oz of pepper jelly

2 cups of pecans, chopped

2 cups of sharp cheddar cheese, shredded

1 bunch of green onion, chopped (greens only)

1 T of mayonnaise (yepper, that’s right .. mayo)

Combine all of the ingredients, chill and serve.

#yumola


nutdip2

Kimmie Bee’s Chicken Fajitas

Share

So, do me a favor. Try this recipe and then share with me the RAVE reviews you receive. No, REALLY! And, NEVER BUY a pre-packaged fajita mix again. K? ☺️ Thanks. Honestly, it is SOOOO flavorful and you can use it with shrimp or steak as well.

You will need ….

4 T of oil

the juice from 1/2 of a lemon or a whole lime (I prefer lime)

1/2 t chili powder

1 1/2 t ground cumin

1 t garlic powder

1/2 t kosher salt (can add more if you like)

1 1/2 t dried oregano

1/2 t paprika

1 t crushed red pepper flakes

1 onion sliced

1 green bell pepper, julienned

1 yellow pepper, julienned

1 red pepper, julienned

1 1/2 – 2 lbs of boneless; skinless chicken breasts, cut in 1/2 (lengthwise) and then into strips about the size of your peppers

flour or corn tortillas

In a large bowl, combine 2 tablespoons of the oil, lemon or lime juice and all of the spices.  Mix to blend.  Add the chicken; cover and refrigerate up to four hours.  If you’re using shrimp, marinate for 15 minutes and the full 4 hours for steak.

In a large skillet, saute the peppers and onion in the remaining oil until just tender.  Remove from the pan and set aside.  Take the chicken out of the bowl and throw away the marinade.  In the same skillet, cook the chicken over medium-high heat for 5-6 minutes or until no longer pink.  Return the onions and peppers to the pan, combine and continue cooking for 3-5 minutes.

image

image

Serve with tortillas, sour cream, avocado/guacamole or your favorite toppings.  These fajitas are really good over Spanish rice and black beans; topped with salsa, guacamole and sour cream … like a burrito bowl.


image#yumola

Pasta Salad

Share

I saw this salad on ’30 minute meals’ (Rachael Ray) and wanted to try it. It was really good, but I wanted more flavor and a different pasta. So, like many of the recipes I make, I put my spin on it. However, the inspiration and original recipe props go to Rachael. It is GREAT for Summer time dining; especially with grilled chicken, but it is delicious any time of year! In fact, it is a staple on my buffet table at my annual ornament exchange party.  It looks SO festive in a red bowl and is a crowd pleaser. Whatever you do, DO NOT skip the feta, olives or artichoke hearts.  If you’re not a fan of these, keep scrolling.  They are the ROCK stars in this recipe.  TRULY!

You will need …

1/4 c extra virgin olive oil

3 T red wine vinegar (use a good quality one … trust me)

the juice of 1 lemon

6oz bag of baby spinach, chopped

1 – 2 cans of artichoke hearts packed in water, drained and chopped in half  (I use 2 because I love them!)

1/2 pound of feta cheese, crumbled

1/2 cup of pitted Kalamata olives, roughly chopped

1/2 of a medium red onion, chopped

1/2 cup of fresh Italian flat leaf parsley, chopped

1 lb of bow tie pasta, cooked al dente, well drained and cooled

kosher salt and freshly ground black pepper to taste

Combine the first three ingredients in the bottom of a large bowl and whisk. Add the remaining ingredients and toss to coat with the dressing. Season with salt and pepper.


spinach-artichokepastasalad

#yumola

Kimmie Bee’s Roasted Garlic & Rosemary Potatoes

Share

These potatoes pair well with my roasted garlic and rosemary chicken, but are a simple and delicious side dish for any meal.

You will need the following:

1 bag of small red new potatoes or 1 bag of baby yukon gold potatoes (washed and sliced in half or thirds)… you can do a mixture of both. Fingerling potatoes are also DELISH in this recipe.

1/4 cup olive oil

kosher salt

freshly ground black pepper

4-6 gloves of garlic minced

2-3 sprigs of fresh rosemary

1-2 tablespoons of dried rosemary

In a large bowl, combine the potatoes, olive oil, salt, pepper, garlic and rosemary. Put potatoes on a cookie sheet or shallow dish and bake on 350 degrees for 45 min to an hour or until tender. Shake the potatoes from time to time to make sure they’re not sticking. If they appear to be too dry, drizzle some olive oil on top.

#yumola

Baked Macaroni and Cheese

Share

Who doesn’t like macaroni and cheese? Okay, maybe there are a few of you that don’t. But, this recipe will even have YOU diving in! There are a ton of mac and cheese recipes out there. I even have a few variations that I make. However, this recipe is tried & true and has been in my family forever! If you’re looking for low fat; low cal or any other ‘low’, keep scrolling. This AIN’T that. 😊 But, if you want a YUMOLA; creamy and extra cheesy plate of absolute comfort & deliciousness, keep reading.

Seen here served with roasted chicken, cornbread dressing and roasted asparagus. SOOOO good!

mac&cheese

1 pound of macaroni

kosher salt

4 cups of milk or evaporated milk

1 stick of unsalted butter

1/2 cup all-purpose flour

6 cups of extra-sharp Cheddar, grated (1/4 cup reserved to sprinkle on top)

1 teaspoon of kosher salt

1 teaspoon freshly ground black pepper

1/2 teaspoon nutmeg

Preheat the oven to 375°F.

Bring a large pot of salted water to a boil and cook macaroni according to the package instructions for al dente. Drain well and set aside.

Heat the milk in a small saucepan, but do not allow it to boil. Melt the butter in a large pot (big enough to hold the milk and macaroni) and add the flour. Cook over low heat for 2 minutes, stirring with a whisk. Whisk in the hot milk and cook for a minute or two more, until thickened and smooth. Remove from the heat and add the cheddar cheese, 1 tsp salt; pepper, and nutmeg. Add the cooked macaroni and stir well. Pour into a baking dish. Sprinkle reserved cheese on top and bake for 30-35 minutes, or until the sauce is bubbly and the macaroni is browned on top.

#yumola

Buttermilk Biscuits

Share

We went to visit my Mom’s parents every Summer, the 3rd Sunday in August to be exact. Oh, how I looked forward to this yearly trip to Mississippi. My Mom came from a big family and all of my aunts and uncles came with their families too. Cousin time in full effect! We went to church revival, spent countless hours outside playing and eating some of the best food I’ve ever had in my life! I loved spending time with everyone, but really loved stealing moments, alone, with my grandfather. That was hard to do with so many people in the house. So, I would wake up very early so I could sit and have breakfast with him while everyone else was still sleeping. I have a painting in my home that reminds me of my ‘alone time’ with my grandpa. But, some of my fondest memories of those Summers was the time I spent with my grandmother in her garden picking vegetables for dinner or sitting at her feet on the porch as we shelled peas or right at her side as she made homemade biscuits and homemade peach preserves. This buttermilk biscuit recipe, after years of trying, is as close as I can get to my beloved grandmother’s biscuits.

2 cups of all purpose flour

2 T (heaping) of baking powder

1 t salt

1 T sugar

1 stick of very cold butter

1 cup of buttermilk

Preheat oven to 400 degrees.

In a bowl, whisk all of the dry ingredients together. Grate the ice cold butter into the flower mixture using a handheld grater. Using two knives, cut the butter into the flour. I prefer this method over using a pastry cutter. Pour in the buttermilk and mix just until the dough is formed. Do not overmix. Turn the dough out onto a floured surface and turn over (in a kneading fashion, but be gentle) three times. Pat dough into a rectangle about 1 1/2 to 2″ thick.  Using a medium sized cutter or glass, cut the biscuits. Try to cut them as close as you can so that you don’t have any scraps left. The less you handle the dough, the lighter your biscuits will be. Brush off the excess flour and place biscuits on a cookie sheet. Bake for 13 minutes or until they just start to brown.

image

#yumola